Label Printing in BPWin
Label Printing
BPWin can generate printed labels and programmed RFID tags using dynamic data from the current job session. All label printers that support a text-based command language are supported. This includes virtually all commercial and industrial major-brand label printers from suppliers such as Zebra, Wasp, Datamax, and many more. All barcode types are supported, limited only by the capabilities of the printer that you choose. BPWin will print the label using real-time values from the job session for text fields and barcode encoding. For label printers that also support RFID tag programming, BPWin can generate the content for the tag in tandem with any printed label.
Because BPWin interfaces with the printer using the Windows print driver and a text-based command language, you don't have to hassle over your particular printer model being supported. In fact, any printer that supports this style of interface is ready to plug-and-play with BPWin. Examples of text-based command languages are: EPL, ZPL, ZPL2, WPL, or any other supplier's proprietary format, so long as it is a text-based command language sent directly to the printer. What this means is that the label content sent to the printer is comprised of command codes that are interpreted by the printer itself to generate the text, barcodes, RFID, etc. This is opposed to sending graphical data directly to the printer, such is the case with conventional document printing. This scheme allows the printer to create complex content like barcodes on-the-fly, without BPWin having to natively support any particular barcode format.
How to Design Labels
Printer Command Files
Tag | Description |
{BpmMediaDeviceResults} | Device operation result statistics for all devices in the filled media. For example: Not Blank: 5 Continuity: 7 Verify: 3 This would mean that 5 devices failed the "Blank Check" portion of their operation, 7 failed the "Continuity" portion, and 3 failed "Verify". Note that for most media populated by being specified in the "Destination" field of the autohandler workflow dialog, this table will merely consist of a single "Passed" statistic whose number matches the number of devices in the media. An example such as the one above would most likely be found in a label that was printed for the reject media. |
{BpmMediaNumActualDevices} | The total number of devices in the media. |
{BpmMediaMaxNumDevices} | The media's capacity. This value can currently only be provided for trays, otherwise BPWin will replace this tag with "N/A". |
{BpmMediaName} | The name of the destination as specified in the "Destination" field in the autohandler workflow settings window. |
{BpmMediaTimeOfFirstDevice} | The date/time that the first device was placed into the media. |
{BpmMediaTimeOfLastDevice} | The date/time that the last device was placed into the media. |
{BpmMediaNumBlankDevices} | The number of devices in the media that never had a device operation attempted to be performed. |
Tag | Description |
{BpmJobQty} | What was entered in the quantity text box, no commas. |
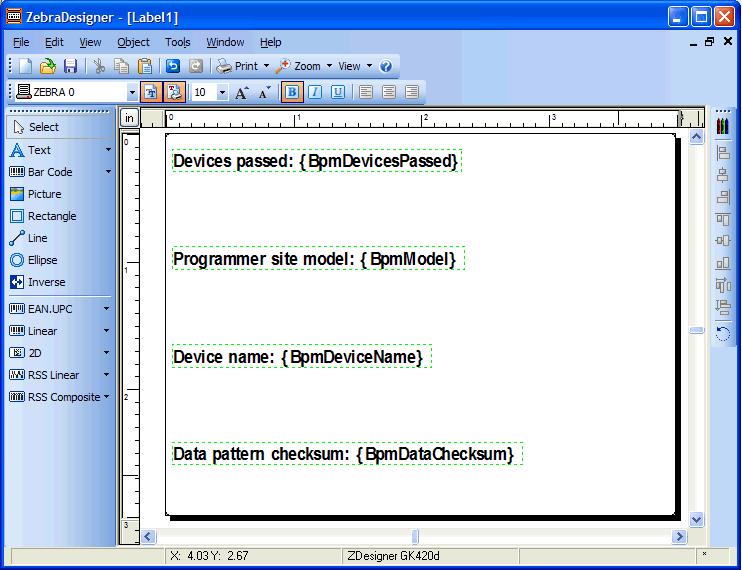
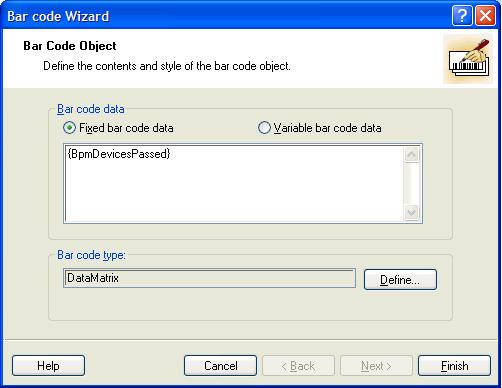
{BpmDevicesPassed} | How many devices were passed then placed into the output, not just passed by the programmer. |
{BpmJobName} | The root name of the JobMaster file. (eg "Job123") |
{BpmJobFilename} | The JobMaster filename plus extension. (eg "Job123.bp"). |
{BpmJobFilepath} | The full path and full filename of the the JobMaster file. (eg "\\CustomerJobs\MyCustomer\Job123.bp") |
{BpmJobId} | The operator supplied JobId. |
{BpmModel} | Programmer site model. (eg "BP-2710"). |
{BpmSwVer} | The BPWin version (eg "5.10.0"). Includes a designator for betas ("Beta"). |
{BpmDeviceName} | The device name excluding the manufacturer |
{BpmDeviceManuf} | The manufacturer of the device |
{BpmDataFilepath} | The name of the buffer as it appears in the main BPWin window |
{BpmDataFilename} | The full path of the data pattern file |
{BpmDataTimestamp} | The data pattern file timestamp in IS08601 UTC format ("Zulu Time"). (eg "YYYY-MM-DD hh:mm:ssZ"). This is the time without any timezone shifts, and the 'Z' at the end designates this. |
{BpmDataChecksum} | The same data pattern checksum that is displayed in the job summary |
{BpmSystemName} | The Windows machine name for the host system. |
{BpmUserName} | The Windows user account name used to access the system. |
{BpmJobEndDate} | The date in ISO8601 format (eg "2010-03-08") when the job session completed. |
{BpmJobEndTime} | The job time in ISO8601 format with timezone (eg "hh:mm:ss [+/-]hhmm") when the job session completed. |
Configuring BPWin to Print Labels

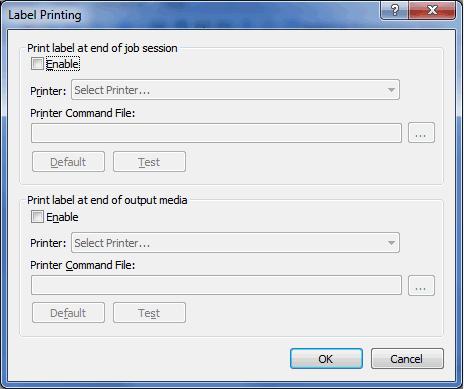
- To print labels at the end of a job session, click the "Enable" box in the "Print label at end of job session" section to place a check in it. To print labels when BPWin has detected that an output media needs to be reloaded, place a check in the "Enable" box in the "Print label at end of output media" section. The following instructions can be applied to both end of job label printing and end of media label printing.
- Select a printer by clicking on the combo box labeled "Printer" to view the list of printers on your system. From the list presented, click the name of the printer you would like BPWin to use to print labels. Clicking on the printer name will make that printer the printer selected in the combo box.
- At this point you can choose to exercise one of these two options:
- a.Click the button labeled "..." to browse for a printer command file that you have previously created. Doing so will place the path to the selected file in the "Printer Command File" field.
- or
- b.Click the "Default" button to specify that you would like BPWin to use the default label distributed with BPWin. This will place the text "" in the Printer Command File field.
- If you would like to see what the label will look like when one is printed at the end of a job session, click the "Test" button. BPWin will make a temporary copy of the contents of the printer command file in PC RAM, replace all tags in those contents with a version of the content that reflects the current configuration of BPWin, and print a label by sending those contents to the printer.
- When you're done configuring label printing, click OK to close the Label Printing window. The settings are stored in the system registry and will be restored the next time you open BPWin.
Example Procedure
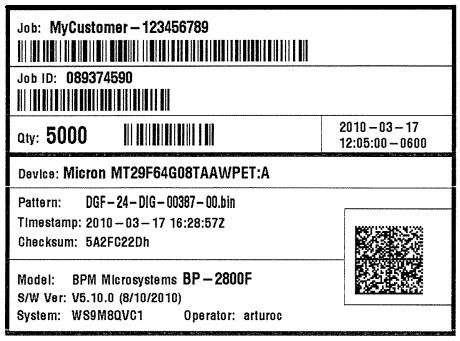
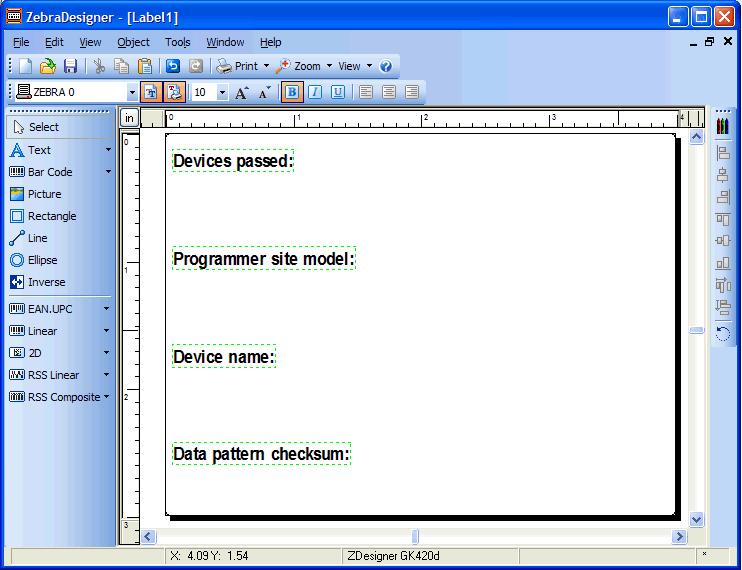
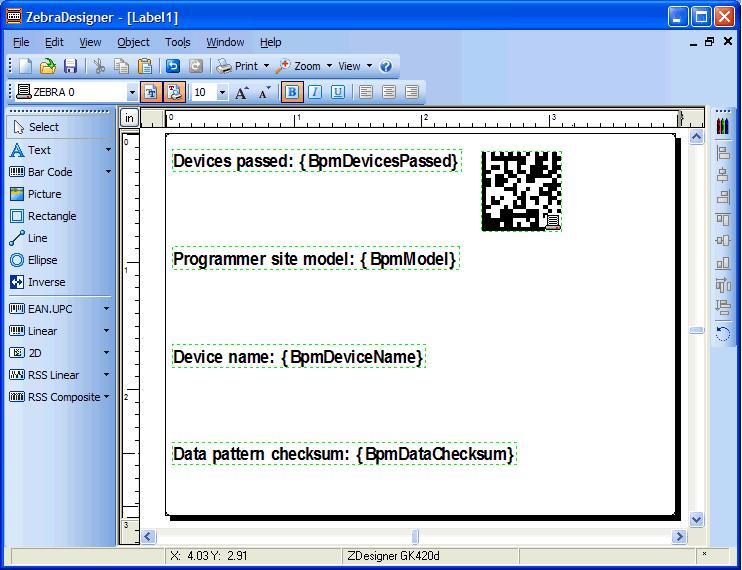
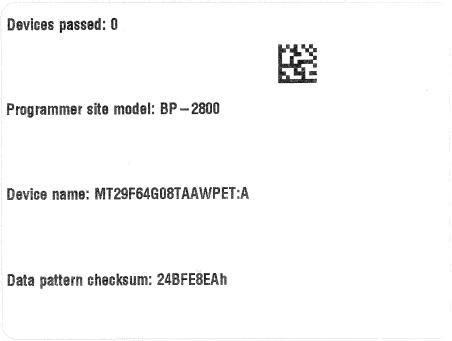
- Number of passed devices.
- Programmer site model.
- Device name.
- Data pattern checksum.
- Configure BPWin to run a job session. For this example, we selected device Micro MT29F64G08TAAWPET:A and loaded a data pattern named DGF-24-DIG-00387-00.bin.
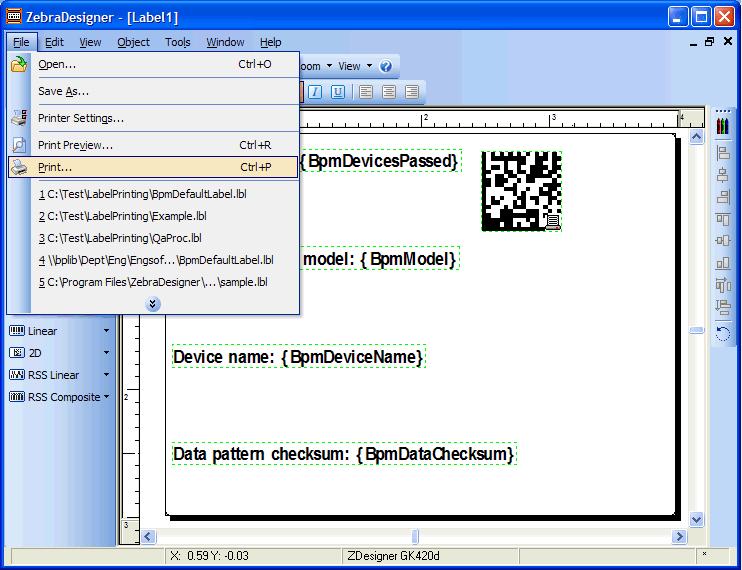
- In BPWin, choose menu items Tools/Label Printing.... The "Label Printing" window will open:
- Place a check in the "Print label at end of job session" box. You will now be able to select a label printer and specify the printer command file that we saved in step 4c above.
- Select your label printer in the "Printer" field. In this example we use "Zebra GK420d":
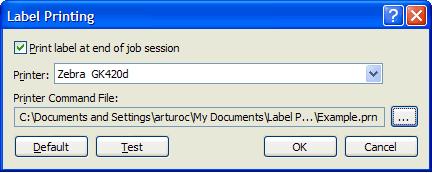
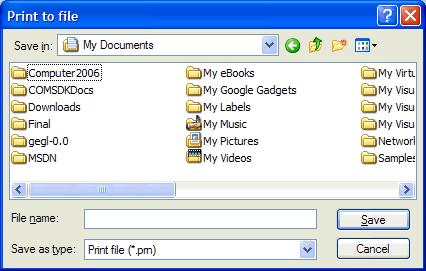
- Click the button labeled "..." to specify the printer command file you saved in step 4c above. Doing so presents an "Open" window that will allow you to browse for the file. For this example we selected the file we saved in step 4c above by navigating to folder "Label Printing" under "My Documents" and selecting the file named "Example.prn".
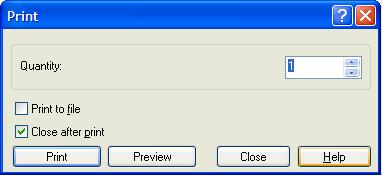
- Click the "Open" button in the "Open" window. This will close the "Open" window and bring you back to the "Label Printing" window where you can see that the file you selected has been specified as the "Printer Command File". For our example, this is what that looks like:At this point you can print a test label by clicking the "Test" button. For our example, this is what our test label looks like:
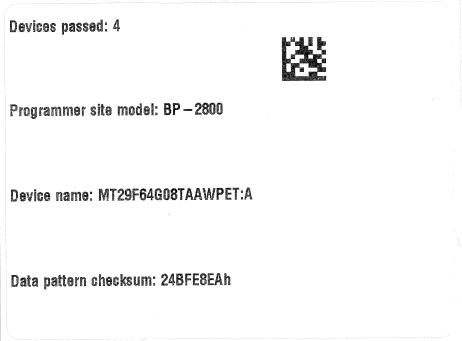
- Click "OK" in the "Label Printing" window. The "Label Printing" window will close. BPWin is now configured to print labels at the end of the job session. For this example a job session with 4 devices was run, at the end of which BPWin printed this label:
Related Articles
Teaching the Label Presenter Location
Teaching the label presenter location is more of a challenge in comparison to teaching other pick and place locations as it requires that the X-axis, Y-axis, and Z-axis to be manually taught. Typically, a label would be too thin to be measured with ...BPWin Log File Limits
As a default, BPWin sets a 1024MB log file directory limit and a 10MB per log file limit, but it is possible to change these values if you wish. To do this, keys must be changed in Windows Registry. Please take care when editing the registry as it ...BPWin Shortcut Keys
The BPWin program also uses keystroke combinations, called hotkeys or quick keys. Listed below are common keys and keystroke combinations. To select a field or menu item, use the keystroke combination <ALT> + <underlined character> in the active ...BPWin - Job Protection
As standard, BPWin provides two levels of user access, Operator, and Supervisor. The permissions for these user-based roles can be customized, for example, to restrict operators from erasing devices or other such functions. Open the Job Master ...BPWin Latest Beta Update
The following list shows the changes made to the latest BPWin beta release software. The current executable beta file is now available on the BPM website for immediate download. www.bpmmicro.com/software/ BPWin V5.30.0 Beta update ...